Honeywell T6 Thermostat Manual: A Comprehensive Guide
This comprehensive guide details the Honeywell T6 Pro Programmable Thermostat, covering installation, operation, advanced features, and troubleshooting—all readily available as a PDF.
The Honeywell T6 Pro Programmable Thermostat represents a significant advancement in home climate control, offering a blend of user-friendly operation and intelligent features. Designed for comfort and energy savings, the T6 Pro caters to a wide range of HVAC systems. This thermostat isn’t just a temperature regulator; it’s a smart home hub capable of learning your preferences and adapting to your lifestyle.
Available in various models – including TH6210U2001, TH6320U2008, and others – the T6 Pro provides customizable scheduling, remote access via the Honeywell Home app, and innovative technologies like Adaptive Intelligent Recovery and Smart Response. These features ensure your home reaches the desired temperature precisely when you want it, maximizing both comfort and efficiency. Understanding its capabilities is key to unlocking optimal performance and enjoying a consistently comfortable indoor environment. This manual will guide you through every aspect of the T6 Pro, from initial setup to advanced programming.
Understanding the T6 Pro Models (TH6210U2001, TH6320U2008, etc.)
The Honeywell T6 Pro series encompasses several models, each designed to meet specific needs and system configurations. Common models include the TH6210U2001, TH6320U2008, and TH6220U2000, among others. While sharing core functionality, key distinctions lie in compatibility with different HVAC systems and the inclusion of certain advanced features.
Generally, models with higher numbers (like TH6320) often support more complex systems, such as multi-stage heating and cooling. The T6 Pro is compatible with a wide array of systems, but verifying compatibility with your specific setup is crucial before installation. Each model boasts a 32-page user guide available online in PDF format. Referencing the specific model number ensures you access the correct documentation for your thermostat, detailing its unique capabilities and wiring requirements. Understanding these nuances guarantees optimal performance and a seamless integration with your home’s heating and cooling infrastructure.
Key Features of the Honeywell T6 Thermostat
The Honeywell T6 Pro boasts several key features designed for comfort and energy efficiency. Adaptive Intelligent Recovery learns your system’s heating/cooling rates, ensuring desired temperatures are met precisely when scheduled. Smart Response Technology further refines this by quickly adjusting to temperature changes. Geofencing utilizes smartphone location to automatically adjust settings when you come and go, saving energy.
Remote access via the Honeywell Home App provides control from anywhere, while Vacation Mode simplifies temperature management during extended absences. The thermostat supports basic scheduling, and is compatible with various HVAC systems. Detailed information, including a downloadable PDF manual, explains each feature. Models like the TH8320Z (though a different series) demonstrate Honeywell’s commitment to advanced control. These features combine to offer a user-friendly and intelligent climate control experience.

Installation & Wiring

Proper installation requires specific tools and adherence to safety precautions; wiring diagrams are essential for connecting to common HVAC systems and the C-wire.
Tools Required for Installation
Before beginning the installation of your Honeywell T6 Pro thermostat, gathering the necessary tools is crucial for a smooth and safe process. A small, flathead screwdriver is essential for tightening terminal screws and accessing the thermostat’s wiring compartment. A Phillips head screwdriver may also be needed, depending on your wall plate’s mounting screws.
Wire strippers are vital for preparing the thermostat wires, ensuring clean connections. A wire connector or wire nuts will securely join wires if needed. A level is important to ensure the thermostat is mounted straight on the wall for aesthetic appeal and accurate readings.
A digital multimeter can be incredibly helpful for testing voltage and confirming proper wiring, especially when dealing with complex HVAC systems. Finally, a pencil for marking wires and a drill with appropriate bits (if new mounting holes are required) complete the toolkit. Always prioritize safety by having insulated tools and wearing appropriate eye protection.
Safety Precautions Before Installation
Prioritizing safety is paramount before commencing any thermostat installation. Always disconnect power to your HVAC system at the breaker box to avoid electrical shock. Confirm the power is off using a non-contact voltage tester. Carefully label each wire connected to your existing thermostat before disconnecting them – a photograph can be incredibly helpful!
If you are uncomfortable working with electrical wiring, consult a qualified HVAC technician. Never work with wet hands or in a damp environment. Be mindful of any safety limit thermostats connected to your system, such as manual reset models (e.g., SB), and understand their function.
Exercise caution when drilling into walls, checking for hidden wiring or plumbing. Wear appropriate safety glasses to protect your eyes from debris. Following these precautions will ensure a safe and successful installation of your Honeywell T6 Pro thermostat.
Wiring Diagrams for Common HVAC Systems

Successful installation hinges on correctly matching the wiring to your specific HVAC system. Common configurations include single-stage and multi-stage heating and cooling setups. The Honeywell T6 Pro supports various systems, but accurate wiring is crucial. Diagrams illustrate connections for terminals like R, C, W, Y, G, and others, representing power, heat, cool, and fan control.
For systems with a C-wire (common wire), the wiring is generally straightforward. However, older systems may lack a C-wire, requiring a C-wire adapter kit. Diagrams detail how to connect safety limit thermostats, often found with manual reset features. Understanding the function of terminals like ST2 (second stage heating) and X2 is vital for complex systems.
Refer to the detailed wiring diagrams in the T6 Pro manual (available as a PDF) or on the Honeywell Home website. Incorrect wiring can damage your HVAC equipment or the thermostat itself.
Connecting to the C-Wire (Common Wire)
The C-wire, or common wire, provides continuous power to the Honeywell T6 Pro thermostat, enabling its smart features and display. Many modern HVAC systems include a dedicated C-wire, simplifying installation. Connect the C-wire to the ‘C’ terminal on the thermostat’s backplate. If your existing wiring lacks a C-wire, a compatible C-wire adapter kit is often necessary.
These adapters ‘borrow’ power from other wires, effectively creating a common connection. Carefully follow the adapter kit’s instructions, as incorrect installation can lead to system malfunctions. The T6 Pro manual (PDF format) provides detailed diagrams illustrating C-wire adapter connections for various HVAC setups.
Ensuring a secure C-wire connection is paramount for reliable thermostat operation. Without it, the thermostat may exhibit erratic behavior or fail to power on consistently.
Wiring for Single-Stage Heating and Cooling
For single-stage systems, the wiring is relatively straightforward. Connect the Rh wire (heating power) to the ‘Rh’ terminal on the thermostat. The Rc wire (cooling power) connects to the ‘Rc’ terminal. The W wire controls the heating, connecting to the ‘W’ terminal, while the Y wire manages cooling, connecting to the ‘Y’ terminal.
The G wire, responsible for fan operation, connects to the ‘G’ terminal. If a C-wire (common wire) is present, connect it to the ‘C’ terminal for consistent power. Refer to the Honeywell T6 Pro manual (available as a PDF) for detailed wiring diagrams specific to your HVAC configuration.
Double-check all connections before powering on the system. Incorrect wiring can damage the thermostat or HVAC equipment. A secure and accurate wiring setup is crucial for proper functionality.
Wiring for Multi-Stage Heating and Cooling
Multi-stage systems require more complex wiring, utilizing additional terminals on the Honeywell T6 Pro. Typically, you’ll have Rh and Rc for heating and cooling power, respectively. However, multiple W wires (W1, W2) control different heating stages, and multiple Y wires (Y1, Y2) manage cooling stages.
The W1 wire activates the first stage of heating, while W2 activates the second. Similarly, Y1 controls the first cooling stage, and Y2 the second. The G wire still controls the fan. A C-wire is essential for powering the thermostat in multi-stage setups.
Consult the detailed wiring diagrams in the Honeywell T6 Pro manual (PDF format available online) to correctly identify each wire and its corresponding terminal. Incorrect wiring can lead to inefficient operation or system damage.

Thermostat Operation
The Honeywell T6 Pro features an intuitive interface for adjusting settings, scheduling temperatures, and selecting operational modes like heat, cool, or auto for comfort.
Navigating the T6 Pro Interface
The Honeywell T6 Pro thermostat boasts a user-friendly interface designed for straightforward operation. The main screen prominently displays the current temperature and setpoint, alongside mode indicators (Heat, Cool, Auto, Off). A central dial or touchscreen (depending on the model) facilitates temperature adjustments; simply rotate or swipe to increase or decrease the desired temperature.
Menu navigation is typically achieved through dedicated buttons or on-screen prompts. Pressing the “Menu” button reveals options for scheduling, system settings, and advanced features. Within the menu, utilize the up and down arrow keys or touchscreen swipes to scroll through available choices. Selecting an option is usually confirmed with an “OK” or “Select” button;
The interface also provides visual cues, such as icons, to represent different functions and settings. Pay attention to these icons to quickly understand the thermostat’s current status. Familiarizing yourself with the layout and button functions will ensure efficient control over your home’s climate.
Setting the Date and Time
Accurate date and time settings are crucial for proper scheduling and operation of your Honeywell T6 Pro thermostat. To adjust these, begin by accessing the thermostat’s menu – typically via a dedicated “Menu” button on the device. Navigate through the menu options until you locate “Date and Time” or a similarly named setting.
Within this section, you’ll usually find separate fields for setting the year, month, day, hour, and minute. Use the up and down arrow keys, or touchscreen controls, to increment or decrement each value until it reflects the correct information. Ensure you confirm the AM/PM setting for accurate time display.
After making adjustments, select “Save” or “Apply” to store the new date and time. A correctly configured date and time ensures your programmed schedules function as intended, optimizing comfort and energy savings.
Programming a Basic Schedule
Creating a schedule allows your Honeywell T6 Pro to automatically adjust temperatures, maximizing comfort and energy efficiency. Access the “Schedule” option within the thermostat’s menu. You’ll likely encounter options for different day types – weekday, weekend, or individual days. Select the day or day type you wish to program.
For each day, you can define multiple “periods” or time blocks, such as “Wake,” “Leave,” “Return,” and “Sleep.” For each period, set the desired temperature. Use the arrow keys or touchscreen to adjust the time and temperature for each period.
Repeat this process for all desired days and periods. Remember to save your schedule after making changes. A well-programmed schedule ensures optimal temperature control throughout the week, reducing energy consumption and enhancing your comfort.
Understanding Heat, Cool, and Auto Modes
The Honeywell T6 Pro offers three primary operating modes: Heat, Cool, and Auto. In Heat mode, the thermostat activates the heating system when the room temperature falls below the setpoint, providing warmth. Conversely, Cool mode activates the cooling system when the temperature exceeds the setpoint, delivering cooling.
Auto mode intelligently switches between heating and cooling to maintain your desired temperature range. The thermostat determines whether to activate heating or cooling based on the setpoint and the current room temperature. This mode is ideal for climates with fluctuating temperatures.
Selecting the appropriate mode ensures your system operates efficiently and maintains consistent comfort. You can easily switch between modes using the thermostat’s interface, typically through a menu option or dedicated buttons.
Fan Control Options (On, Auto)
The Honeywell T6 Pro thermostat provides two distinct fan control settings: On and Auto. Selecting Fan On ensures the blower continuously circulates air, even when the heating or cooling system isn’t actively running. This promotes consistent temperature distribution throughout your home and can improve air quality by filtering air constantly.
Conversely, choosing Fan Auto operates the blower only during heating or cooling cycles. This setting conserves energy as the fan isn’t running unnecessarily. It’s a more efficient option for those prioritizing energy savings.
You can easily toggle between these fan control options through the thermostat’s menu. Consider your comfort preferences and energy-saving goals when selecting the optimal setting for your needs.

Advanced Features & Settings
Honeywell T6 Pro boasts features like Adaptive Intelligent Recovery, Smart Response, Geofencing, and remote access via the Honeywell Home App for optimal control.
Adaptive Intelligent Recovery Explained
Adaptive Intelligent Recovery is a smart feature within the Honeywell T6 Pro Thermostat designed to enhance your comfort and energy efficiency. Unlike traditional thermostats that simply turn on heating or cooling at a set time, the T6 Pro learns the thermal characteristics of your home.
Over time, it analyzes how long it takes your HVAC system to actually reach your desired temperature. This learning process allows the thermostat to proactively start heating or cooling earlier than scheduled. This ensures your home is precisely at the temperature you want it to be when you want it to be, without wasting energy by overshooting or undershooting the mark.
Essentially, it anticipates the time needed, adapting to factors like insulation, window efficiency, and even outdoor temperatures. This intelligent adjustment provides consistent comfort and potentially reduces energy consumption, making it a valuable feature for homeowners seeking both convenience and savings.
Smart Response Technology

Smart Response Technology, integrated into the Honeywell T6 Pro, builds upon Adaptive Intelligent Recovery to deliver even faster and more precise temperature control. While Adaptive Recovery learns how long it takes to reach a temperature, Smart Response focuses on how quickly the system can respond to changes.
This feature monitors your HVAC system’s performance and adjusts its operation to minimize temperature swings. It actively anticipates and compensates for delays in heating or cooling, ensuring a more consistent and comfortable indoor environment. The thermostat dynamically adjusts its algorithms based on real-time system feedback.
Essentially, Smart Response prioritizes reaching the setpoint quickly and efficiently, reducing the time you might otherwise experience being slightly too warm or too cold. It’s a key component in maximizing comfort and optimizing energy usage, working seamlessly with the T6 Pro’s other intelligent features.
Geofencing Capabilities
Geofencing, a powerful feature accessible through the Honeywell Home app when paired with your T6 Pro thermostat, allows for automated temperature adjustments based on your location. You define a virtual perimeter – a “geofence” – around your home using your smartphone.
When your smartphone leaves the geofence, the thermostat automatically switches to an energy-saving “Away” mode, lowering heating or raising cooling setpoints. Conversely, as you approach the geofence, the thermostat anticipates your arrival and returns to your preferred “Home” comfort settings.
This eliminates the need to manually adjust the thermostat or remember to do so, ensuring both comfort and energy savings. Multiple users can be configured with individual geofences, providing personalized climate control. The Honeywell Home app provides easy setup and customization of geofencing parameters.
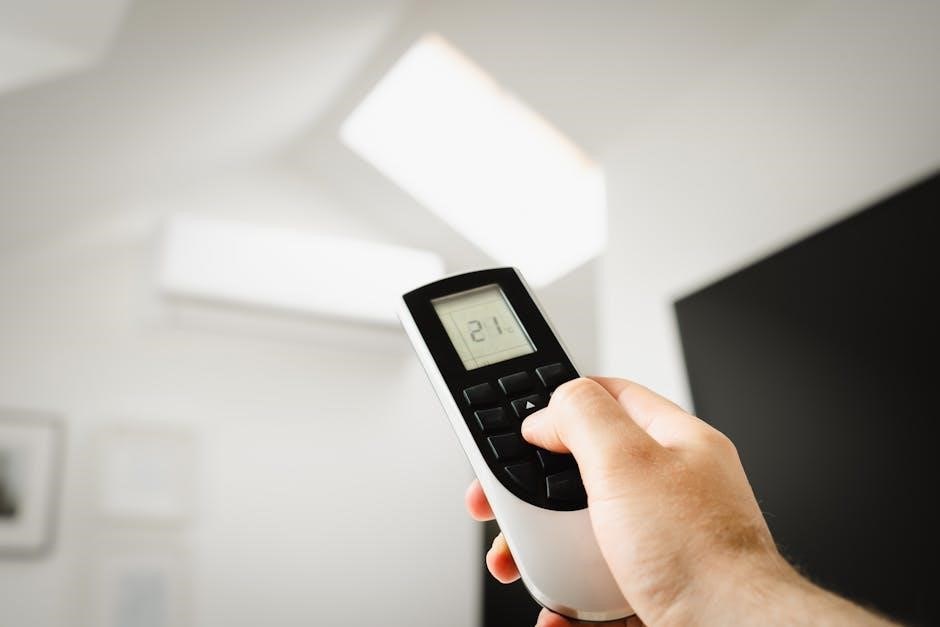
Remote Access via Honeywell Home App
The Honeywell Home app unlocks the full potential of your T6 Pro thermostat, providing convenient remote control from anywhere with an internet connection. Download the app (available for iOS and Android) and create an account to connect your thermostat.
Through the app, you can adjust the temperature, change modes (Heat, Cool, Auto, Off), create and edit schedules, and monitor energy usage—all from your smartphone or tablet. This is particularly useful when you’re away from home and want to ensure comfort or conserve energy.
The app also provides access to advanced features like geofencing and vacation mode. Real-time thermostat status updates and customizable alerts keep you informed. Securely manage multiple Honeywell Home devices from a single, unified interface;
Vacation Mode Setup
Vacation Mode on your Honeywell T6 Pro is designed to save energy while you’re away from home for an extended period. This feature allows you to set a lower heating temperature and a higher cooling temperature than your regular schedule, minimizing energy consumption without risking damage from freezing or excessive heat.
To activate Vacation Mode, navigate to the settings menu on your thermostat or through the Honeywell Home app. You’ll be prompted to enter the start and end dates of your trip. Then, specify the desired hold temperatures for both heating and cooling.
The thermostat will maintain these temperatures until your return date, automatically resuming your regular schedule afterward. Vacation Mode overrides any existing programmed schedule, ensuring consistent energy savings during your absence. It’s a simple yet effective way to reduce utility bills.

Troubleshooting & Support
Resolve issues with error codes, reset to factory settings, or find extensive resources on the Honeywell website, including a downloadable T6 Pro user manual PDF.
Common Error Codes and Solutions
Understanding error codes on your Honeywell T6 Pro is crucial for quick troubleshooting. A “C Wire” message typically indicates a missing or improperly connected common wire – essential for consistent power. If you encounter this, verify the C-wire connection at both the thermostat and furnace/HVAC unit.
“E1” often signals a communication issue between the thermostat and the HVAC system; check wiring connections and ensure compatibility. A flashing “0” may point to a low battery, even with a C-wire present – replace the batteries as a precaution. “Rh” or “Rc” errors suggest a power issue with the heating or cooling transformer; consult a qualified HVAC technician.
For intermittent issues, try resetting the thermostat. If problems persist, refer to the complete PDF manual available on the Honeywell website for detailed diagnostics and potential solutions. Remember to always prioritize safety and disconnect power before inspecting wiring.
Resetting the Thermostat to Factory Defaults
Resetting your Honeywell T6 Pro to factory defaults clears all personalized settings, returning it to its original state. This is useful for troubleshooting persistent issues or preparing the thermostat for a new user. To initiate a reset, navigate to the thermostat’s menu. Typically, this involves pressing the “Menu” button, then selecting “Settings” or “Advanced.”
Within the settings, locate the “Reset” or “Factory Reset” option. Confirm your choice, as this action is irreversible without re-programming. The thermostat will power cycle and revert to its initial setup screen.
After the reset, you’ll need to re-establish your Wi-Fi connection (if applicable), set the date and time, and re-program your desired heating and cooling schedules. Consult the T6 Pro user manual (PDF) for specific menu navigation steps, as variations may exist between models (TH6210U2001, TH6320U2008, etc.).
Finding Additional Support Resources (Honeywell Website)
Honeywell’s official website serves as a comprehensive hub for T6 Pro thermostat support. You can access a wealth of resources, including frequently asked questions (FAQs), detailed troubleshooting guides, and downloadable documents. A key resource is the complete T6 Pro user manual (PDF), available for various models like TH6210U2001 and TH6320U2008.
The website also features instructional videos demonstrating installation, programming, and advanced feature utilization. Furthermore, Honeywell provides access to a community forum where users can share experiences and solutions.
For direct assistance, locate the “Contact Us” section to connect with Honeywell Customer Support via phone or online chat. Ensure you have your thermostat model number readily available for efficient support. Explore Honeywell Home’s support pages for the most up-to-date information and assistance.
Downloading the T6 Pro User Manual (PDF)
Accessing the Honeywell T6 Pro user manual in PDF format is straightforward and provides a readily available, detailed reference guide. The official Honeywell Home website hosts downloadable manuals for all T6 Pro models, including the popular TH6210U2001, TH6320U2008, and others. These manuals typically span 32 pages, offering comprehensive instructions.
Before downloading, ensure your computer has Adobe Reader or a compatible PDF viewer installed to properly display the document. The PDF manual covers everything from initial setup and wiring diagrams to advanced programming features like scheduling and geofencing.

Downloading the manual allows offline access to crucial information, making it ideal for troubleshooting or reviewing features without an internet connection. A direct link to the PDF can usually be found within the support section of the Honeywell Home website.
Contacting Honeywell Customer Support
For personalized assistance with your Honeywell T6 Pro thermostat, reaching out to Honeywell’s customer support team is a valuable option. The Honeywell Home website provides various contact methods, including a dedicated support section with frequently asked questions and troubleshooting guides. Direct phone support is also available, offering real-time assistance from knowledgeable representatives.
When contacting support, having your thermostat model number (e.g., TH6210U2001) readily available will expedite the process. Be prepared to describe the issue you’re experiencing in detail, and any error codes displayed on the thermostat.
Honeywell’s support team can assist with wiring questions, programming challenges, and resolving error messages, ensuring optimal performance of your T6 Pro system. Online chat support may also be available for quick, convenient assistance.